Art Frame with Calligraphy Quote for for Fall/ Autumn Home Decor Tutorial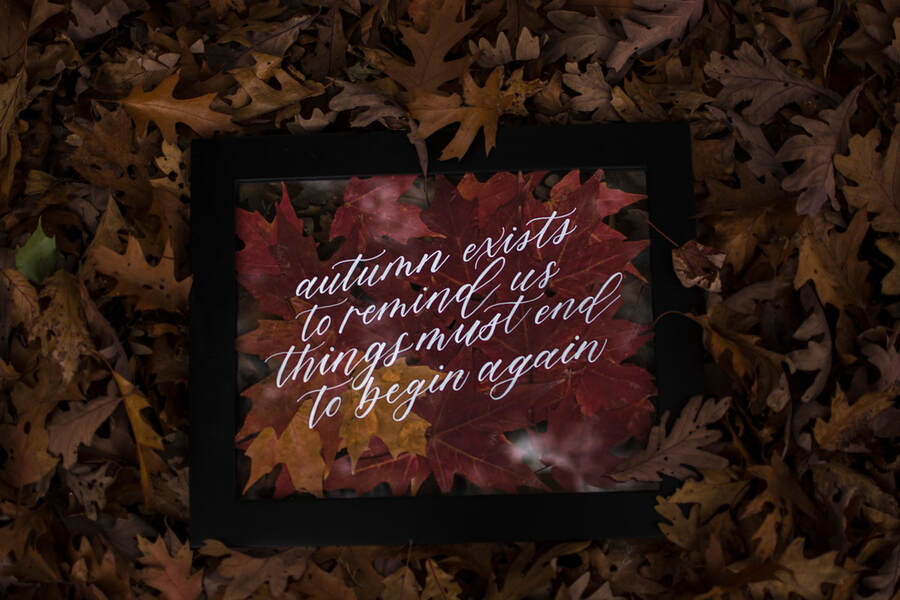 Calligraphy Quote on a foliage floating frame 2019 Make this beautiful autumn/ fall wall art using golden leaves and a bit of creative calligraphy using this step by step tutorial below. Fall comes and goes annually but after 15 years living in Canada, I finally preserved a little bit of fall and turned it into a part of my home decor. I collected all my leaves off my neighbour front yard, where they own a beautiful Japanese Maple tree; that would turn orange/ red once the temperature dropped to around 15 degree Celcius and pressed/preserve them in a frame and have it as a background for a calligraphic quote I hand-lettered on the top of the glass. This is my first tutorial I write for A Grateful Note and possibly is my favourite project to date. Fall is my favourite season. Fall signified the day I landed in Toronto, where I begin my new journey to become a Canadian after leaving everything I have ever known and had 14,000 km across the world . It was my first time seeing autumn, as the fall foliage was something I would never see in Vietnam. It was fascinating walking around James Park in the weekends, seeing the leave changing colours and feeling the crisp cold air on my face, Fall is magical; it is the season of harvest and the season of love and is the season that exist to remind us things must end to begin again. WHAT YOU NEED: - White Sharpie Oil Paint Pen - Japanese Maple Leaves - Gallery Solution Black Floating Glass Frame - Ipad with Apple Pencil + Procreate App (Optional) - Printer/ Scanner (Optional) - 50% Vinegar / Paper Towel for Glass Cleaning
In the end, the frame went on my art wall after the photoshoot; side by side with artworks I purchased from many Canadian artists. I hope you enjoy this post and don't forget to like, comment and subscribe to get more future tutorials; straight to your mailbox. 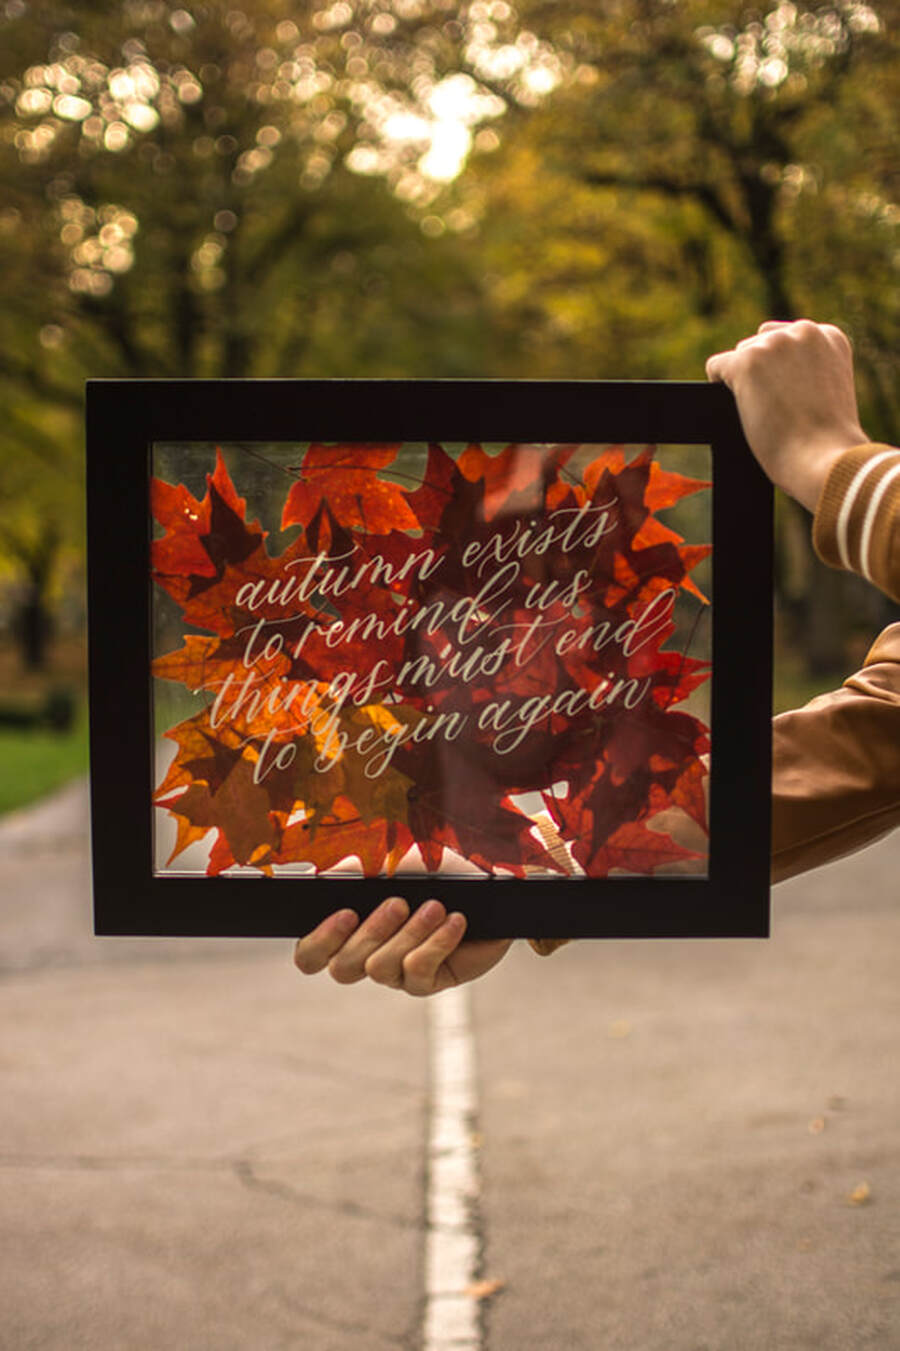
4 Comments
14/7/2021 05:03:51
Such a great blog. Thanks for sharing. Keep sharing that kind of post with us. 6/11/2022 23:33:11
Thank you so much for sharing this! It is so inspiring and we got a lot of ideas. This is also a must read for all people who's looking for an <a href="https://www.windsongtagaytay.com" title="event's place" alt="event's place">event's place</a> that is perfect for any kind of occasion. Kudos! 19/3/2023 09:45:37
Thank you so much for sharing this! It is so inspiring and we got a lot of ideas. This is also a must read for all people who's looking for an <a href="https://www.windsongtagaytay.com" title="event's place" alt="event's place">event's place</a> that is perfect for any kind of occasion. Kudos! Your DIY tutorial for the fall foliage frame is simply stunning! I've always admired calligraphy and incorporating it into home decor seems like such a creative idea, especially for the autumn season. The step-by-step instructions are clear and encouraging, making it feel accessible even for beginners like me. I can't wait to gather some seasonal foliage and give this a try. Thank you for sharing such a beautiful and inspiring project! Leave a Reply. |