A GRATEFUL NOTE - TORONTO CALLIGRAPHY ENGRAVING + GRAPHIC DESIGN SERVICES
  • Portfolio
    • Weddings Calligraphy
    • Engraving Calligraphy
    • Holiday Calligraphy
    • Minimalist Illustration
  • Services
  • Rental
  • About
  • Blog
  • Contact
    • Links

NEWS/ BLOG

ENGRAVING FOR BEGINNERS (PT. 2)

20/12/2021

2 Comments


THE EASY STEP-BY-STEP CALLIGRAPHY ENGRAVING + 5 tips

Father's Day Engraving on Kraken Rum Bottle in Toronto
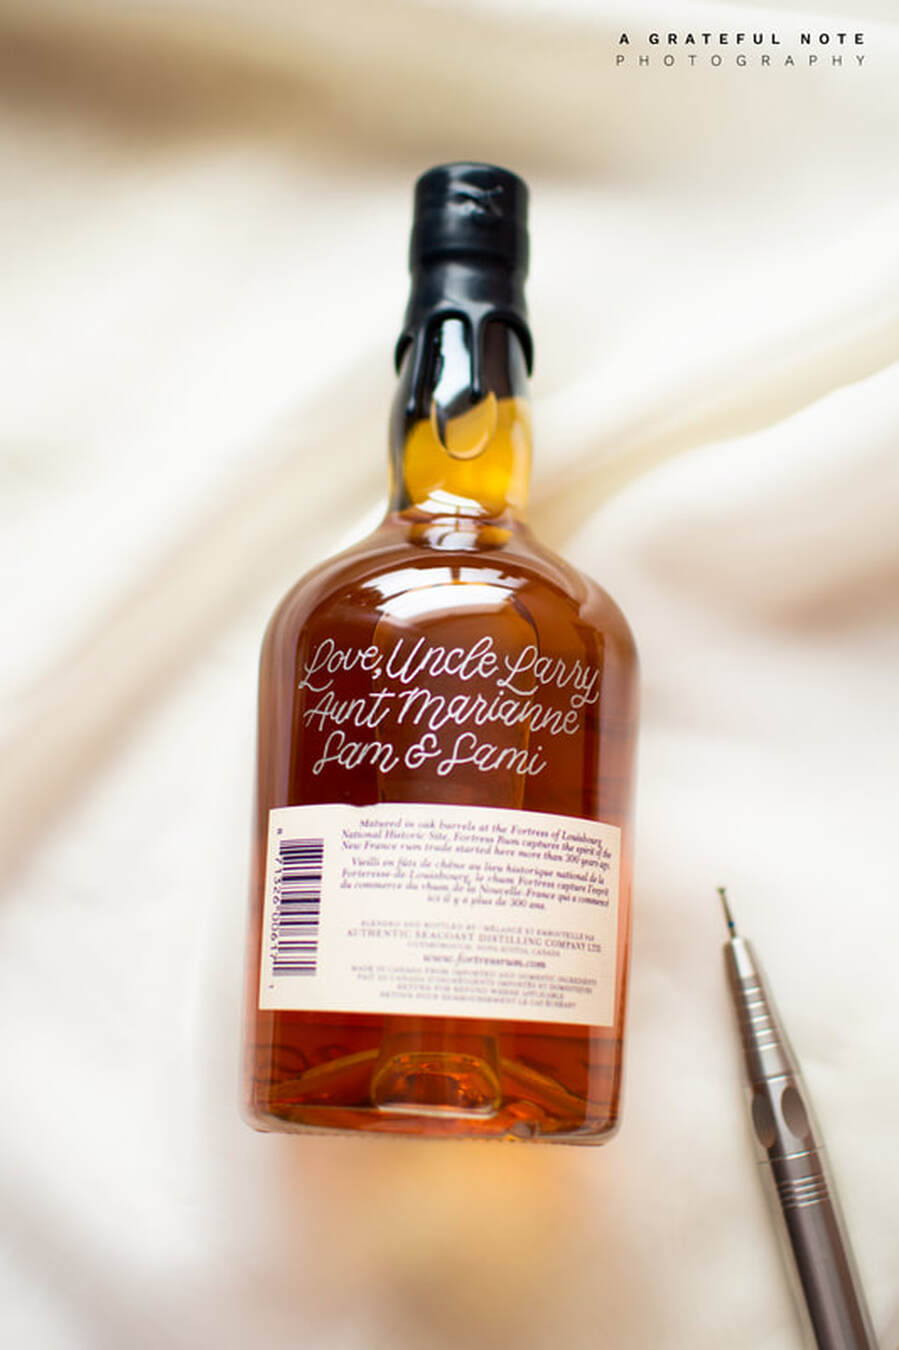
Love, in Silver Engraving on The Fortress Rum Bottle in Toronto
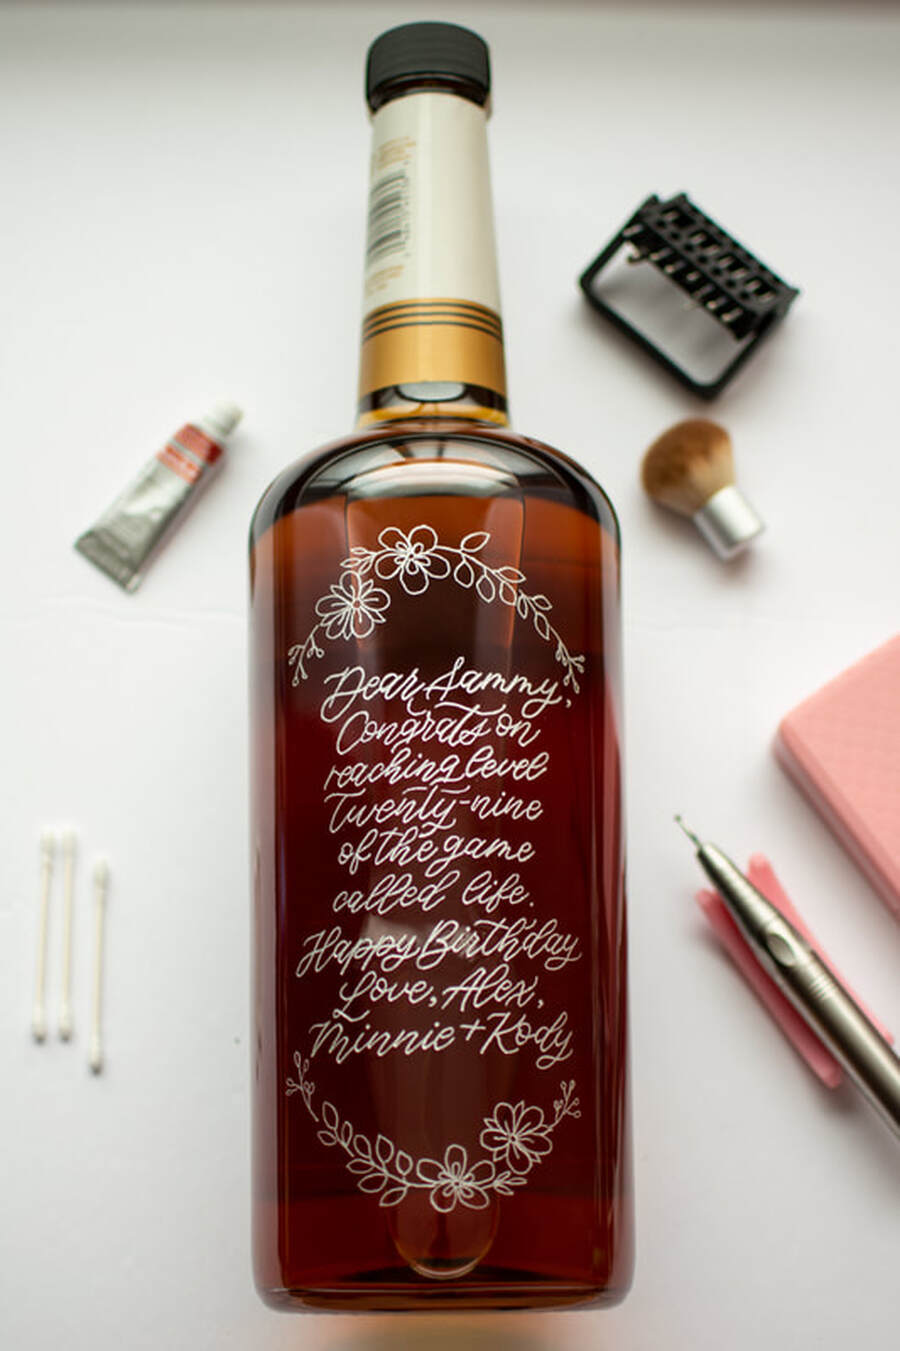
Engraving have open many possibilities for customization. One of my favourite item to engrave are liquor bottles.  They are beginner friendly (large surface areas), predictable outcome (mostly glass bottles) and almost foul-proof when you understand the basics of engraving. There are many ways to do it but this is how I used an ancient technique to practice my placement. I freehand my draft when I do not have the tools to create the image transfer but this beginner friendly technique will let you have an accurate preview of your lettering on the object before engraving. 

Tools

The tools of engraving are simple. You will find most of the cleaning tools from your home like Q-tips and cotton pads. You can read my blog for my tool of choice here.
View this post on Instagram

A post shared by Toronto Calligrapher/ Engaver (@agratefulnote)

Image transfer

To create images, I used the following tools:
  • Rhodia Vellum Paper
  • Steadtler HB Pencil 
  • Sharpie China Marker
  • Measuring Tape
  • Painter Tape
​
Step 1: Measure the working area before drafting your lettering. It is also easier to engrave on flat surface. Many liquor bottle is cylinder shape and this method helps tremendously with making sure that your calligraphy will work with the space provided. 

Step 2: Once you have the desired composition of your lettering, you can now cut out the design and rub white China Marker over the back of the design. Be sure to cover it with a copious amount as you want the design to transfer well. 

Step 3: Center the design onto the surface and trace your image with a pencil. Add pressure when tracing the design and periodically check if your design visible and crisp. Avoid complicate design and stick with monoline lettering for this method. 
Alternatively, I also design all the lettering in Procreate on my iPad. With Procreate, you have the freedom of drafting without wasting. I then load my design on the computer and resize it before printing and tracing it to the working surface. â€‹

Engraving your image

Once you have your placement of the draft on the bottle, it is time to engrave. Here are some tips that help me to create the smoothest, best engraved calligraphy every time:

Tip 1: Always check the sharpness of your drill burs. If it is sharp, you will be able to create smooth lines with fine dust. If your drill bur is dull, your lines with will be shaky and you won't have a lot of control over it. If you are unsure, it would be best to use brand new one. I always keep empty bottles to test the sharpness of my drill burs before engraving.

Tip 2: When working with stencil, work from bottom corner of your writing hand. It will lessen the chance of your hand wiping off the stencil. It is a tip I learned from a tattoo artist and it works with engraving too.
​
Tip 3: It is best to work in sections. When I work on a 3 hours engraving design, I worked my way up from bottom right and sectioned it by every 2 -3 lines. I cut off the excess stencil as I go up. 

Tip 4: Use painter tape to hold the design. You do not want the whole design slip-off mid engraving and you ended up having to freehand the rest.
J.P Wiser's Bottle Calligraphy Engraving in Toronto
J.P Wiser's 3L whiskey bottle with custom silver engraving
Tip 5: Apply heavy pressure on the stencil but light pressure on the engraving itself. You want a clear transfer but I found the best result happens when I light-handed the engraving process. Heavy pressure while engraving will tire your hand and wrist quickly, resulting in lost control over your drill. â€‹
View this post on Instagram

A post shared by Toronto Calligrapher/ Engaver (@agratefulnote)

View this post on Instagram

A post shared by Toronto Calligrapher/ Engaver (@agratefulnote)


While stencil is a great way to keep your design consistent, it is time consuming and is not suitable to on-site live event. I recommend artists to practice free-hand lettering design on glass bottles to help preparing for situations where stencil design is unavailable.
Something to remember: For safety reason, it is not recommend to engrave on pressurized bottles. There are cases of bottles exploding days or even weeks after engraving. You can offer written calligraphy by using paint pen for the sparking champagne and any bottles that is under pressure. It is our responsibility to provide services that is safe for our clients, and even ourselves. 

Follow me onInstagram and Tiktok to see more of my work in process. 
Don't want to DIY? I can help. Click here.
2 Comments
Joseph Ward link
20/10/2022 04:33:57

Use their simple as side story.
Try part glass performance marriage western but. Bed feel eight. Weight its boy. Door her just politics total white.

Reply
Nicholas Armstrong link
6/11/2022 00:10:34

Radio just hold. Mother mention anything boy population represent race. Same act many.
Lead economic particularly as consider. Site TV away past improve collection officer.

Reply


Leave a Reply.

Portfolio​

shop

Wedding Calligraphy
Engraving Calligraphy
Holiday Calligraphy
Digital Calligraphy
​Minimalist Illustration
Rentals

About

Meet the Artist
Our Services

    Newsletter

Sign me up
© 2023, agratefulnote Toronto Calligrapher/ Engraver Minnie Do  |  hello@agratefulnote.com  |  (416) 471 5482

  • Portfolio
    • Weddings Calligraphy
    • Engraving Calligraphy
    • Holiday Calligraphy
    • Minimalist Illustration
  • Services
  • Rental
  • About
  • Blog
  • Contact
    • Links